2.6 Email Management
RaeAnna Jeffers
Learning Objectives
At the end of this section, the learner will:
- Learn to manage and organize their email inbox.
- Understand basic email etiquette.
Email management
Leveraging and maximizing Outlook features is a key component to staying organized, managing collaborations, scheduling meetings, events, and tasks, and so much more. Learning how to use Outlook as a tool will save you time and frustration in the long term. In this section, we will review some of the most useful features. This will not be an exhaustive listing, but it will get you started.
Email set up
Before you begin relying heavily on Outlook email, take some time to set up folders and rules for managing your inbox. First, decide which folders you would like to create to organize incoming emails. These can be folders for projects, classes, people, topics, etc. Grouping your emails together based on an attribute or importance makes clearing your inbox strategic in that you are able to prioritize more easily what needs to be done first. There is no wrong way to do this. What is important is that you are maximizing the time you spend managing your incoming emails by automating your inbox.
Creating a Rule for an Email in Outlook
- Right-click an email message and select Rules > Create Rule.
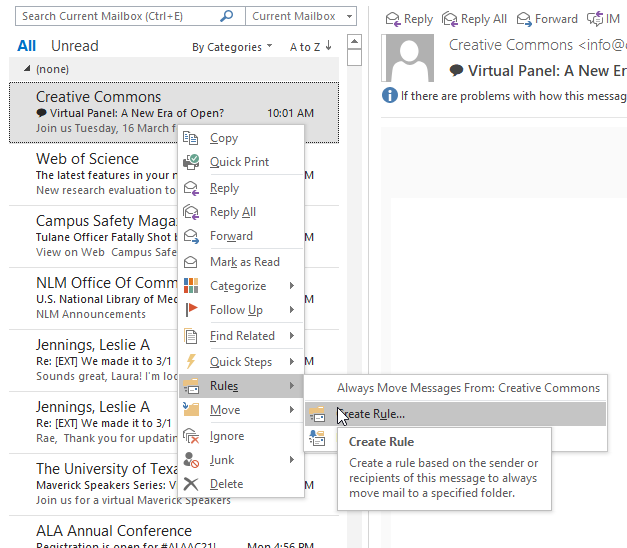
- Select a condition, and what to do with the message based on the condition.
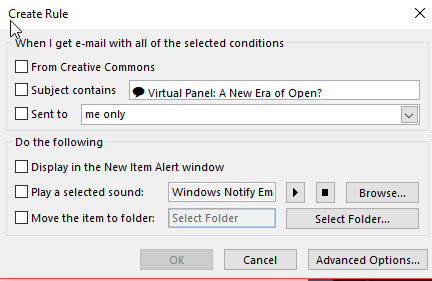
- When you’re done creating the rule, select OK.
- To use the rule right away, select the Run this new rule now on messages already in the current folder checkbox, and then select OK.
The message now appears in the folder you assigned.
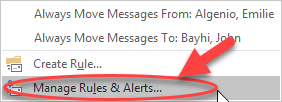
Creating Other Email Rules in Outlook
You can create rules for emails from specific people, words in a subject line, flag certain emails for follow-up, and more. Follow these steps to get to the Rules Wizard. From there, you will decide what rules to apply to the various emails you receive.
- Click the Rules icon, then select “Manage Rules & Alerts”.

- Click “New rule”.
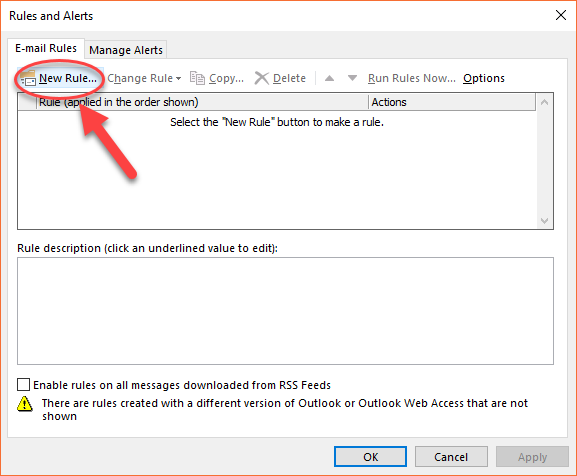
- You have successfully navigated the Rules Wizard. Create rules based on your preferences from this screen.
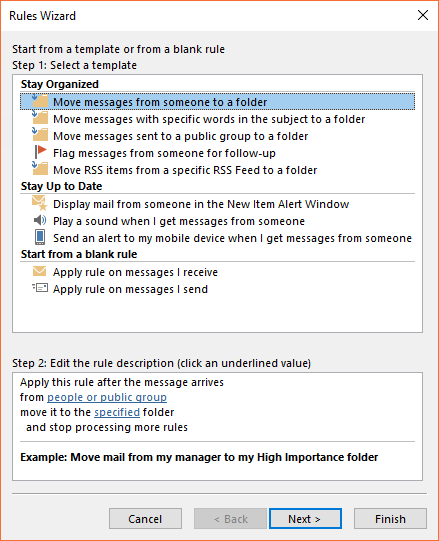
- More information on Rules Wizard can be found on the Microsoft Support Page.
Flagging Outgoing Messages for Follow-Up
Use the flag feature to keep up with messages you send that require a follow-up. Here are the steps:
- Create a new email by clicking the “new email” icon.

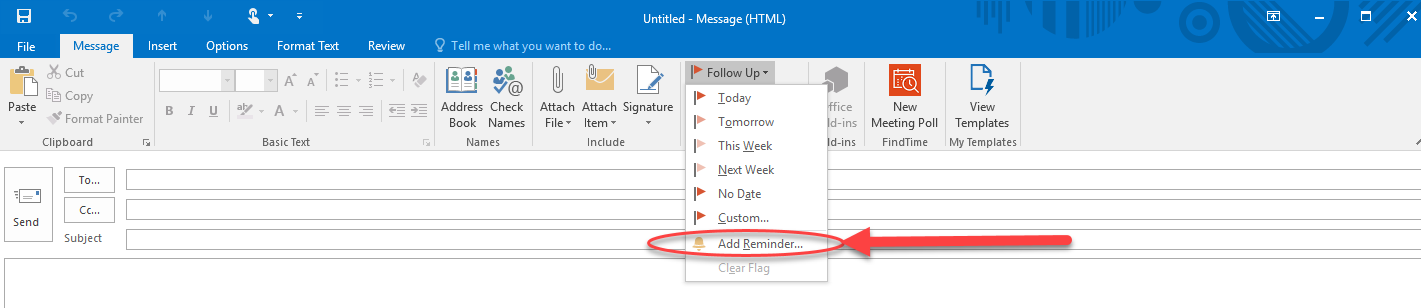
- Click the “Follow-Up” flag icon and select an option.
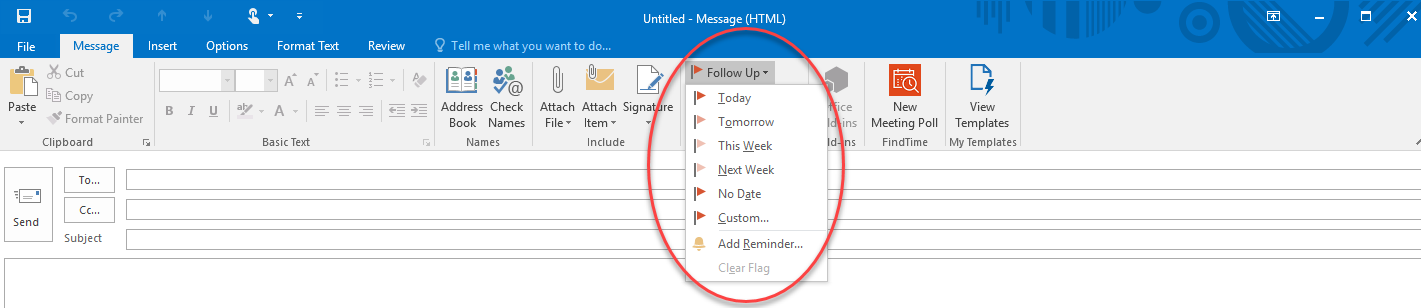
- You can set yourself a reminder as well.

Flagging Incoming Messages for Follow-Up
Incoming messages can also be flagged for follow-up.
- Right-click on the message you want to follow-up on to view the options.
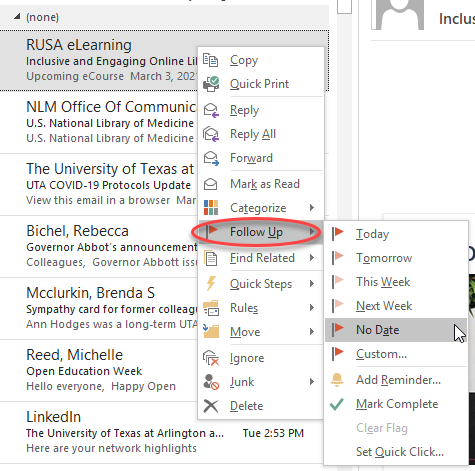
- Set yourself a reminder.
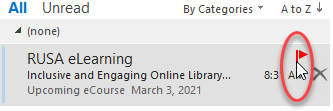
Adding Emails to Your To-Do List
Your to-do list can include emails for follow-up as well.
- In the message pane, click the flag to add the email to your to-do list.
Viewing Your To-Do/Task List
There is more than one way to view your to-do/task list in Outlook. The first way allows you to view the list as part of your email inbox screen. Follow these steps:
- Click on the View tab on the ribbon.

- Click the “To-Do Bar” Icon.

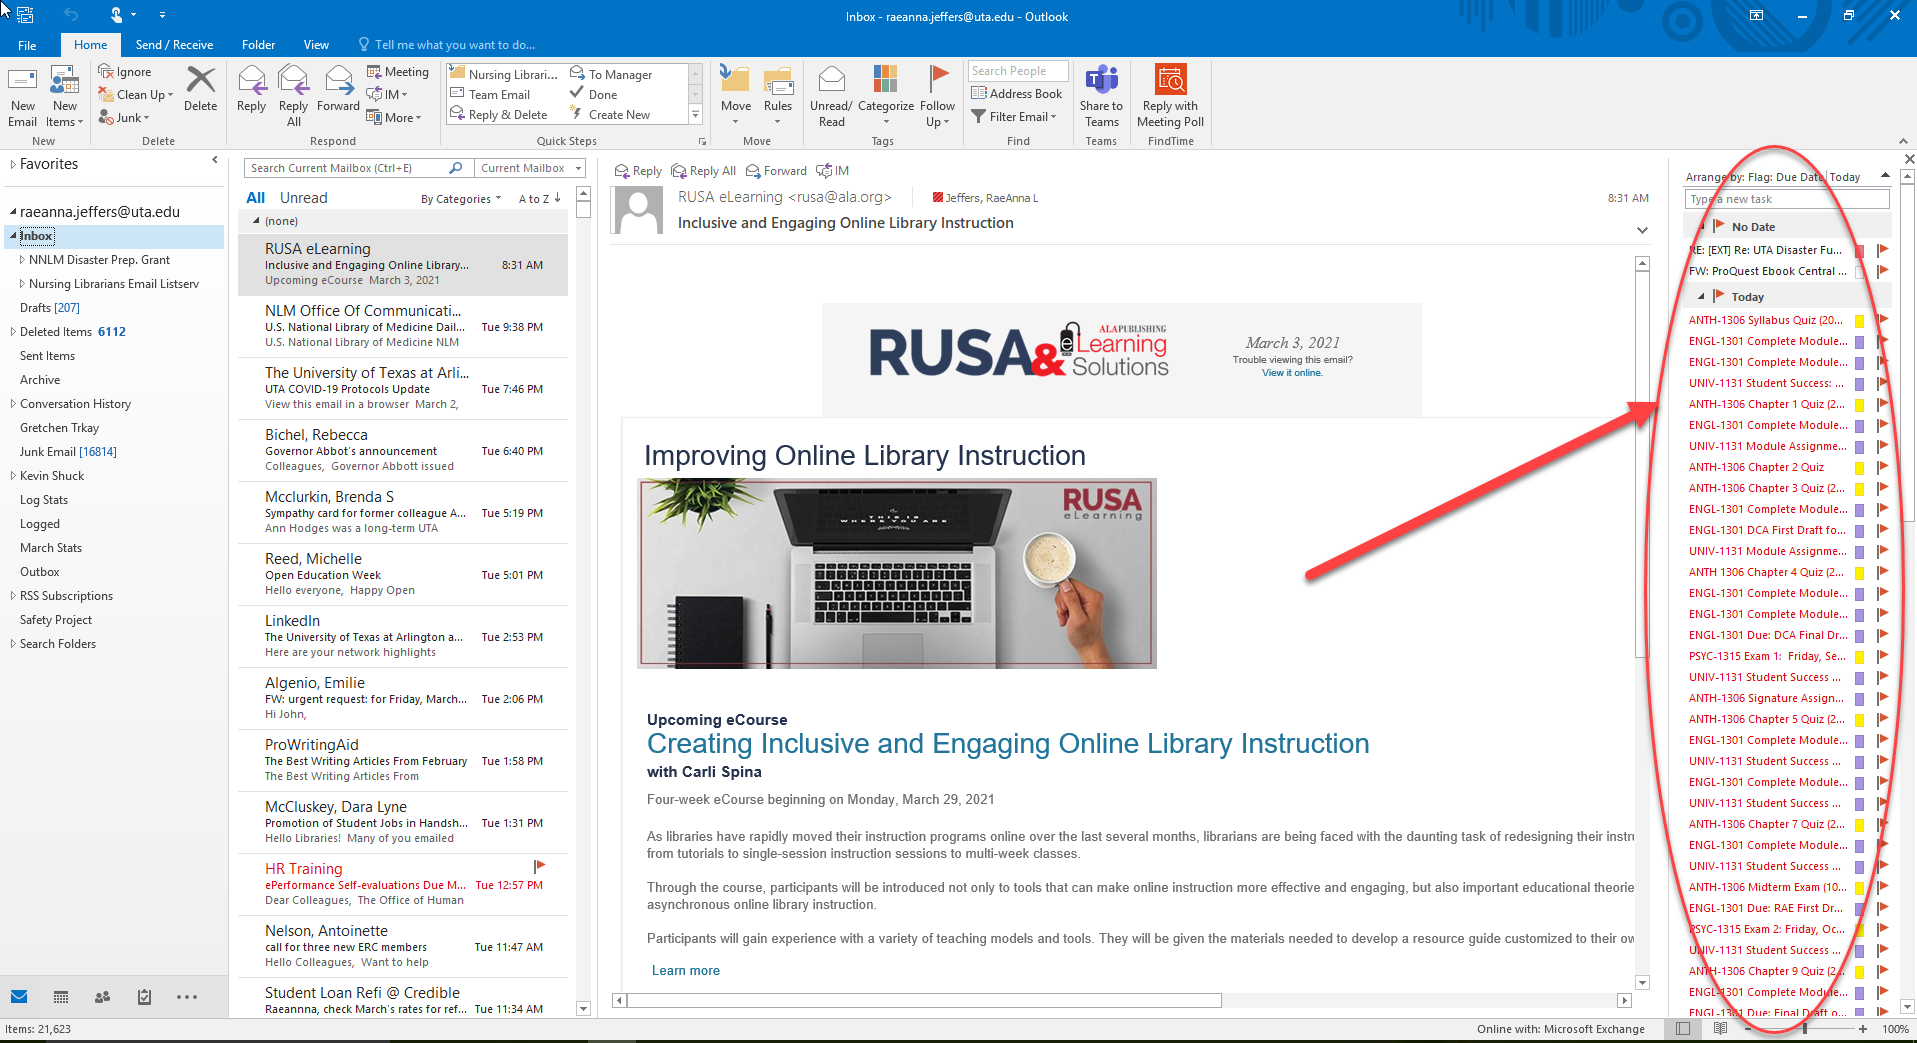
- Select the items you would like to view in the email inbox pane. For now, Tasks is selected, but you can add the other options if you wish.
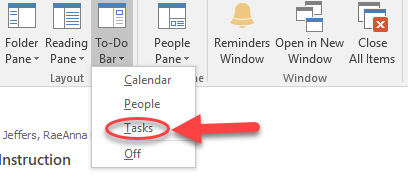
- Your to-do/task list now appears on the right side of your reading pane.
The second way to view your to-do/task list is as follows:
- Click the Task icon.
- To view your To-Do list in the full reading pane, select “To-Do List” from your available options.

You can now see your To-Do list in the reading pane. Emails flagged for your to-do list, items entered manually, their status, and other important elements are shown in the To-Do list.
*Tasks do not appear here unless you enter them manually. See below for information about Tasks. You will have to switch to the Task pane to see those. Directions to follow.
- Click on “Detailed” to see full details about an entry.

- To view the Task list, select “Tasks” from the available options:

- You can add tasks manually here by clicking on the first field in the table.

Setting Up Email on Mobile Devices
The following settings are from the Office of Information Technology. Follow the steps to add your Office 365 student email account to a mobile phone or tablet. These settings are known to work on most Android and Apple iOS devices.
Universal Configuration Instructions:
- Open your email application, select new account, and choose the Exchange account type.
- Under the “User name” field, enter your full student email address. i.e. john_doe@mavs.uta.edu
- Under the “Password” field enter your MyMav /NET ID password.
- Under the “Email address” field, enter your full student email address. i.e. john_doe@mavs.uta.edu (The contents of the user name and email address field should be exactly the same.)
- The “Server address” is m.outlook.com.
- The “Domain” box should be left blank.
- These settings should allow your student email account to be added to your device.
iPhone/iPad Configuration Instructions:
- Go to Settings
- Click on “Mail, Contacts, Calendars”
- Click “Add an account”
- Select “Exchange” from the account types.
- Enter your FULL UTA student email address.
- Enter your MyMav/NetID password
- Enter a description that suites you
- On the next page:
- Server = mail.office365.com
- Domain = leave this field blank
- Username (if you’re asked for one) = your FULL UTA email address
- Password = should be filled in automatically; if not, enter your current password
- Press Continue
* If you get a server error, but the option to continue, please continue *
* If you get an invalid username/password issue, either your email address and/or password is NOT input correctly. Please erase and retype slowly. *
Known Issues:
Android devices will require you to allow remote security administration before your account can be added.
Additional Email Considerations
Now that you have reviewed how to manage the basic mechanics of Outlook, let us take a look at other considerations associated with email.
Setting Frequencies
Basic Etiquette
Consider Your Email Address:
It is a professional practice to use an email account that identifies you as the owner. Email addresses with names like CatzRCute@gmail.com are viewed as unprofessional, are not likely to be read, or may end up in a junk or spam folder.
The Subject Line
The subject line is the first thing your reader will see when they look at their email list. Things to consider about the subject line:
-
- Your reader likely receives hundreds of emails a day from various sources.
- Your email subject line should get the reader’s attention.
- Your email subject line should tell the reader what you need.
- Be short
- Be specific
Your Greeting
Like your subject line, your greeting can set the tone of your email. A respectful greeting is required. If you are familiar with the person you are emailing, you may use their first name. However, if you are uncertain how the person wishes to be addressed, err on the side of respect and address them by their last name. The following greeting examples are acceptable:
-
- Dear Dr. Smith,
- Dear Mr. Smith,
- Dear Mark,
- Hello Dr. Smith,
- Hello Mr. Smith,
- Hello Mark,
Writing the Body of Your Email
In the body of your email, be sure to include the following:
-
- Introduce yourself.
- Tell the reader why you are writing.
- Tell the reader what you want from them.
- Tell the reader when you need it done. If you need something by a deadline, do not wait until the last minute to make a request.
- Give the reader time to respond.
Pay attention to the tone of your email. The reader does not have the benefit of assessing your body language to understand the intent of what you are saying. Remember:
-
- Be courteous! Making demands will not go over well. Make polite requests instead.
- Be brief.
- Write complete sentences with correct spelling, grammar, and punctuation.
- Avoid emotionally charged emails. Come back to it later when you are calm!
- Avoid writing in ALL CAPS. It is viewed as shouting.
- This is a no emoji zone. Save those for social media posts and text messages to your friends.
Closing Your Email
When you are finished with the body of your email, end with a professional close. The following examples are acceptable:
-
- Sincerely,
- Best,
- Kind regards,
Provide your first and last name.
Example:
Sincerely,
Jane Doe
Writing for a Specific Audience
Think about your intended audience before you begin crafting your email. Ask yourself the following questions:
- Who is your audience?
- How often does your audience use email for communication?
- What is your audience’s relationship to you?
- What kind of impression do you want to make?
Email is NEVER private, so be careful about what you write in an email.
Writing to a Professor or Instructor
Is Your Email Necessary?
Most questions can be answered by carefully reviewing course materials such as the syllabus, grading rubric, or other documents. Those are located in the learning management system’s course shell associated with your class. UTA’s learning management system is called Canvas. If your course has a discussion board or announcement feed, check there for the answer to your question, as well.
The number one complaint from professors is that students do not review the information before sending emails. Remember, professors get hundreds of emails a day. Make yours count!
If your purpose is to report an error in course documents, remember to be kind. Mistakes happen- professors and instructors are human, too.
You can also check the library for a guide that might answer your questions. Guides, found here, are created by librarians to help http://www.libraries.uta.eduyou navigate the libraries’ resources as well as course work.
Use Your Student Email Account
When you are writing to your professor or instructor, you are expected to use the email account issued by your school. Other accounts may go into the professor’s junk or spam email folders because you are not recognized as part of the network. If you use an outside email address, your professor or instructor may never see your email.
The Subject Line
The subject line is the first thing your professor will see when they look at their email list. Things to consider about the subject line:
-
- Your professor receives hundreds of emails a day from various sources.
- Your email subject line will need to look like it is from a student to get the professor’s attention.
- Include the following information in your subject line
- Course Name and Section Number (Example: NURS 5366-001)
- Email topic (Example: Meeting Request for Exam 4 Review)
Emailing Your Librarian
When emailing your librarian to ask for assistance locating research, please provide the following information:
-
- Assignment requirements – attach the assignment requirements and/or the grading rubric.
- Search Terms – tell the librarian what terms you have already tried.
- Issues/Problems – what problems are you having? Be specific!
- Make sure to reply to any responses from your librarian.
Emailing your Academic Advisor
When emailing your academic advisor, or anyone else in the university who has access to your student file, include your student ID number. Doing so will get you a faster response, as they won’t have to email you back asking for this information.
Emailing a Prospective Employer
When emailing a prospective employer, you should consider the way you are representing yourself. You want the employer to see that you are conscientious, can communicate effectively, and can be an asset to their team. To do so, keep the following in mind:
-
-
-
- Use proper grammar and punctuation – We covered this in the General Etiquette Tips section, but it bears repeating. Minor mistakes may make the employer wonder what other mistakes you would make that could cost the company greatly.
- Be concise – if the employer feels that you have wasted their time, they are less likely to want to hire you.
-
-
Do your research – don’t ask questions that you can easily find the answer to on their website.
ACTIVITY 2.6: PROSPECTIVE EMPLOYER EMAIL
Prospective Employer Email
Visit this webpage for more information about emailing a prospective employer. Create a draft of an email that could be used, and save for future use.
If you have questions while preparing for your job hunt, please contact the UTA Career Development Center. They provide assistance with crafting your resume, preparing for an interview, and much more!
